Table of Contents
Testing is a crucial part of app development. It helps catch bugs, usability issues and performance problems before release. For iOS apps, Apple provides a service called TestFlight that allows developers to invite users to test pre-release versions of their app.
As per the top iOS app development agency, TestFlight enables seamless beta testing on actual iOS devices. Testers can give feedback to help improve the app before it goes live on the App Store. This article will provide a detailed guide on how to use TestFlight to test your iOS app. We’ll cover setting up a TestFlight build, inviting testers, getting feedback and more.
What is TestFlight?
TestFlight is an official beta-testing service that lets developers distribute preview versions of iOS applications to a select group of test users for rigorous testing prior to the app going live in the App Store.
To start testing with TestFlight, you first need to enroll in the Apple Developer Program. You can do this on the Apple Developer website for a yearly fee. Once enrolled, log in to your Developer Account and go to the TestFlight section according to the top mobile app development company in USA.
Under “Builds” you’ll see any previous builds you uploaded. Click the big blue “+” button to start a new build. Give the build a version number, build number and description. You can also toggle internal testing on/off here.
Internal testing allows you to distribute the build just to your team members for initial quality checks, while keeping it private before a wider release. Once your build is processed, it’s time to invite testers.
How to Use Testflight and Benefits it Brings into Play?
Below the benefits you get while using TestFlight as suggested by the top iOS app development companies:

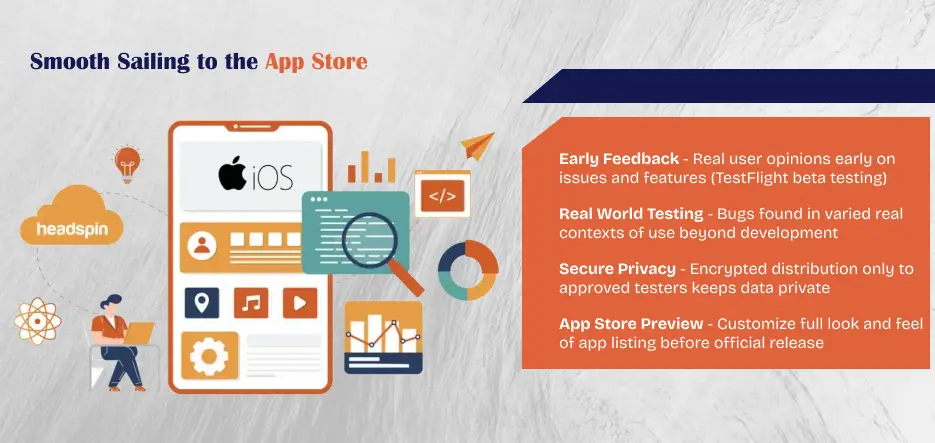
Early Feedback
TestFlight allows developers to distribute pre-release builds of their app to internal testers and external beta testers easily. This helps gather feedback from real users on the ios app design, features, and functionality at an early stage before a public release. Developers can receive feedback via an in-app feedback tool or survey within the TestFlight app. Testers can report issues, leave reviews and ratings. This helps developers identify and address problems, refine or modify features based on user experience, improving the quality and usability of the app before a wider release. It saves time and effort in fixing issues post launch.
Real-world Testing
Testing an app only within development environments cannot identify all real-life scenarios and usage conditions. Distributing through TestFlight expands testing to actual users in real contexts of use. This helps uncover bugs, crashes or performance issues that might occur due to variable device specifications, software versions, network conditions etc. that are difficult to simulate internally. It also helps understand how users actually use specific features rather than assume expected workflows. This realistic, unsupervised testing over extended use catches hard-to-find problems, helping deliver a robust app experience to customers from the beginning.
Security and Privacy
TestFlight maintains privacy and security during beta testing as per the top enterprise mobile app development company. It uses encryption and two-factor authentication for strict access control and app distribution only to approved testers. Sensitive user data is kept private from developers as well as other testers. App review and submission to App Stores happens within the TestFlight platform securely rather than over public app distribution channels. Only qualified testers receive early access, avoiding any breaches. This protects users, maintains confidentiality of in-progress work, prevents leaks
App Store Preview
The Apple App Store Preview feature in TestFlight allows developers to set up how their app will appear on the App Store before its official release. Developers can upload multiple high-quality screenshots in different device orientations and sizes that will be used on the App Store page. They can also write a tailored description and other promotional text that potential users will see when browsing apps. Having the full App Store listing prepared early helps set expectations for what the released app experience will be like.
How does TestFlight Work?
The iphone app development company experts highlights the below requirements for deploying iOS apps to TestFlight:
Apple Developer Account
An Apple Developer account is essential to access the TestFlight beta testing service. It provides access to developer tools, resources and Apple’s beta testing platform. With a developer account, you can generate provisioning profiles, manage certificates and app submissions needed to deploy apps on TestFlight. It is the gateway to distributing pre-release versions of apps to beta testers.
Xcode
Xcode is Apple’s integrated development environment used to build iOS, iPadOS, macOS, watchOS, and tvOS apps. It includes the tools needed to code, test and debug apps. The latest Xcode version, compatible with the current iOS/iPadOS SDK is necessary to compile and build your app bundle for testing via TestFlight. It will package and sign the app with the developer profile. Without a compliant version of Xcode, the app cannot be deployed through TestFlight.
Certificates and Profiles
Specifically, app store and ad hoc provisioning profiles signed with the proper distributor and development certificates are needed to deploy via TestFlight. These are generated within the developer account and associated directly with the app ID and development team. An incorrectly configured or expired profile will result in deployment errors. As per the top mobile app development agency, these keys help identify the developer and validate with the App Store.
Testers’ Apple IDs
The TestFlight app linked to testers’ Apple IDs is where they can access and install pre-release builds. Collecting these IDs during tester onboarding allows developers to invite them to test directly within TestFlight. Their IDs need to match names in the provisioning profile for installation.
How to Deploy an iOS App to TestFlight?
Below are the steps that can help you upload apps to TestFlight to test iOS Apps as per top ios app development services experts:
Step 1: Prepare Your App in Xcode
1. Launch Xcode
Start Xcode to load your application.
2. Configure Build Settings
On the “Project Navigator,” select your project, then go into “Build Settings,” and change the build configuration to “Release.’ This allows your app to be optimized for distribution.
3. Versioning
Select the “General” tab, and then adjust the build number and version number. This is essential to track different versions of your application.
Step 2: Archive Your App
1. Generate Build
From the menu at the top choose your device from the top menu as “Any iOS Device” to make a build that is suitable for distribution.
2. Archive the Build
Click on “Product” > “Archive” to begin the process of archiving.
Archive is the method of creating our app prior to transfer to the flight test. In short, it produces the compressed version of our application to be uploaded in the correct manner.
Step 3: Distribute the App
1. Choose which version of the app you want to Distribute
When the archive process is completed, you will be directed into the All Archives page, here choose the archive that you would like to transfer on the Test flight.
After choosing the archive, click the Distribute button in order to begin the process.
2. Configure the Options
When you click the Distribute App button, you will be given the option of how you wish to distribute the application. You can choose the option that is best suited to your requirements and the goal of the app. we will choose that Test flights option on this blog.
3. Start Uploading the Build
After having selected all the options for configuration, we can begin the distribution process by pressing the button to distribute.
Step 4: Tester Onboarding
1. Access the Login Page
Open your preferred browser and go to App Store Connect.
2. Enter Apple Developer Credentials
Log in with your Apple Developer credentials. Check that you have the proper authorizations to manage the users and build.
3. Access TestFlight Section
After logging in, you’ll be in The App Store Connect Dashboard. You can go into the “My Apps” section and select the app you want to install. On the left sidebar, then click “TestFlight.”
4. Select Internal or External Testing
Then, in the TestFlight section, select “Internal Testing” for your team of developers and “External Testing” for a greater group of users.
5. Add Testers Using Apple IDs
Select”plus “+” (plus) icon to add testers. You must enter into the Apple IDs of those you wish to invite to test as testers. If you want to conduct internal testing, you can use the Apple IDs of the development group. For testing outside, utilize your Apple IDs for outside users.
6. Configure Tester Information
Give additional details regarding each tester, including their initial name, their last name as well as their email addresses. This helps ensure that testers are invited that are accurate.
7. Define Tester Roles and Notifications
You must specify the role of the tester (App Manager Developer, Marketer and Tester) and then select the preferred notifications. This will allow you to personalize your testing experience to suit a particular role.
8. Send Invitations
After all the details have been filled in Once all details are filled in, when all information is filled in, click “Invite” to send invitations to the testers you have added. Testers will be sent an email invitation to join the group for testing.
Step 5: Adding the Build for Testing
Once the upload is completed the most recent version will appear within the IOS Builds section.
It will include some options for app compliance that will request basic information about the app, such as whether your app has any type of authentication, if yes, then what type of it?
As a final stage when you’ve checked all requirements and the app is in compliance, it will be accessible to testers to use for testing through the test flight App.
Testing participants will be sent an email to inform them that the latest build is now accessible for testing.
Step 6: Submit for Review (Optional For Testing)
1. Complete App Information
Complete all required information required on App Store Connect. Include details like app title, key words, as well as screenshots.
2. Submit for Beta App Review
Submit your app for beta App Review. This will help ensure that your app is compliant with the Apple guidelines as suggested by the top mobile application consulting services experts.
Troubleshooting Deployment: How to Solve Common Issues using TestFlight?
Despite meticulous planning the reality of app development can be uncertain. Being able to identify and resolve common issues is a must-have ability for every developer. We will explore possible issues that might be encountered in testing the TestFlight deployment process and offer complete solutions.
1. Code Signing Issues
Symptoms
Errors related to the provisioning profile or signing codes during the process of building.
Solution
Recheck the Apple Developer Center: Ensure that your provisioning profiles and certificates are properly set up. Sometimes just a quick update or re-creation of these within the Apple Developer Center can resolve problems.
Xcode Preferences: Review Xcode preferences to ensure that the correct developer account has been chosen, and that the provisioning profiles are in good order.
2. Build Rejections in App Store Connect
Symptoms
Your build was rejected during your beta App Review.
Solution
Examine Apple’s Guidelines: Review Apple’s Guidelines for App Store Review. App Review of Store Guidelines to find any violations.
Update Metadata: Ensure the metadata of your app such as description, screenshots, and keywords, are in line in accordance with App Store guidelines.
3. TestFlight Invitation Issues
Symptoms
Testers are unable to access the app, or experience problems with TestFlight invitations.
Solution
Verify Tester Emails: Double-check the email addresses of your test subjects are correct, and that accept the TestFlight invitation.
Testers who have expired builds: If you want to use an older version, make sure it’s valid and isn’t expired.
4. Issues With Beta App Review
Symptoms
The delay or rejections can occur in testing the Beta App review process.
Solution
Contact with Apple: If you encounter delays or errors contact Apple via Apple’s Resolution Center in App Store Connect to get clarification.
Follow the Guidelines: Make sure your application follows all guidelines. Apple offers specific feedback throughout the review process. It will help you to address the issues.
5. Issues with TestFlight Distribution
Symptoms
Testers are unable to either download or install the app via TestFlight.
Solution
Examine the Device of the Tester: Make sure that the tester’s device is in compliance with the minimum requirements of the application.
TestFlight app version: Verify that the TestFlight application on the tester’s device is up-to-date.
6. Network or Connectivity Problems
Symptoms
Slow uploads, timeouts or any other network-related issues.
Solution
Secure Internet Connection: Choose a reliable and high-speed internet connection to ensure that there are no interruptions in the upload process.
Retry: If the issue persists you can try uploading your file in non-peak times or on an alternative network.
7. Problems with External Testers
Symptoms
External testers who are having difficulty connecting to and accessing beta.
Solution
Double-check email invitations: Ensure that invitation emails sent out to testers outside of the company are true, and they follow the guidelines provided.
Reisend Invitations: If testers are having issues trying to send invitations, think about revoking the request and sending invitations again.
8. New Terms Agreement
Symptoms
A request for new agreements or terms in the App Store Connect.
Solution
Read and Accept: If you are asked to accept new conditions or agreements within App Store Connect take the time to review these agreements and terms. Accept them for continued use of the platform.
Clear Cookies and Cache: In certain situations clearing the cache and cookies of your browser could resolve issues with acceptance of new conditions.
Final Thoughts
TestFlight offers iOS developers a simple and powerful platform to test apps on actual devices prior to making them available in the App Store. By uploading pre-release versions and inviting testers you can pinpoint and correct problems earlier in the development process.
Examining feedback from both internal and external testing can reveal bugs in performance, usability issues and other difficult to reproduce mistakes. Spending time on quality tests results in a more smooth launch of the app, more satisfied customers and a higher image of reliability.
While it takes some work, TestFlight provides all the required features to conduct robust beta testing. If used correctly, it’s an essential tool in every iOS project. Hope this article was able to provide the complete TestFlight testing procedure and best methods. Contact A3Logics, one of the top iphone app development services providers in the business, if you have any additional concerns!
FAQs
Q: How do I test an iOS app before release?
To test an iOS app before releasing it on the App Store, you can use Apple’s TestFlight service. With TestFlight, you upload your app build and send out invitations to testers. They can then download and try your app on their devices to help identify bugs and other issues.
Q: How do I open TestFlight in iOS?
To open TestFlight on an iOS device, go to the App Store and search for “TestFlight”. Install the TestFlight app, then open it. You’ll see any builds uploaded to TestFlight by developers that have invited you as a tester. Simply tap on a build to download and launch the app for testing.
Q: How to upload an app on testflight?
To submit an app in TestFlight, login to your developer account and upload a new build. Provide notes about the build, build version number, etc. Once uploaded, you can choose internal and/or external testers. Send invites and testers can access the build via a link or the TestFlight app to begin testing.
Q: How do I publish an iOS app to TestFlight?
To publish an iOS app to TestFlight, log into your Apple Developer account and go to the TestFlight section. Select the app you want to test, then upload a new build. Provide information about the build and invite internal testers. Once testers approve the build as bug-free, you can then submit it to the App Store for review and official release.
Q: What’s the maximum number of external testers allowed on a free Apple Developer account?
Free Apple Developer accounts are limited to 100 external testers. Paid Apple Developer Program accounts support up to 10,000 external testers.
Q: Can I test on different device types and iOS versions with TestFlight?
Yes, one of the main advantages of TestFlight is that it allows testing across different devices like iPhones, iPads and various iOS versions. Testers can access your builds from whichever devices they have available.
Q: How long are TestFlight builds and invitations valid for?
TestFlight builds expire after 90 days if unused. Invitations expire after 30 days if unaccepted by testers. You can always upload a new build to refresh these time limits.
Q: Can the same tester test multiple versions of my app at once?
No, a tester can only have one version of the app installed at a time via TestFlight. They need to delete the existing version before reloading a newer one from a new invite or build update. To know more you can always connect with A3Logics, top custom mobile application development company in the business.
Q: Will my testers data and purchases transfer when the app goes live?
No, all app data and in-app purchases are erased when moving from a TestFlight build to the production App Store version. You need to account for this in your testing strategy and provide testing accounts/credits as needed.


